Tires:
Big news is that we've got tires ... and it's starting to look more like a real car. Jared's friend Brad Tucker ( of Tucker Tire in Laguna Hills) hooked me up with a great deal on some Nitto NT 555's (315/35/17 on the rear and 255/40/17 on the front. Big, wide and sticky tires on my Hallibrand replica wheels. Ought to be perfect! Many thanks Brad for helping make them available - and thanks to Jared and Jen (and Jen's sister Kim) for bringing them up to St George when I couldn't get down there to pick them up.
 |
| Nitto tires .... with a bonus can of Diet Coke ("I'm not addicted to Diet Coke. I can quit drinking it anytime, I just don't want to!") |
 |
| Almost lost my tires when they became "cars" for the little girls (Laney and Megan) |
 |
| Nitto tires mounted on the Hallibrand wheels (minus spinners) and on the car. |
 |
| Starting to look like a real car! |
 |
| Jared with Jen's sister Kim in the shop |
Aluminum Panels - cockpit area:
Before the tires arrived, with the fuel and brake lines done, I was working on the cockpit aluminum panels when I realized I'd need to get "under/behind" the cockpit panels to install the wiring harness - so I stopped installing panels ... at least till the wiring is closer to being done.
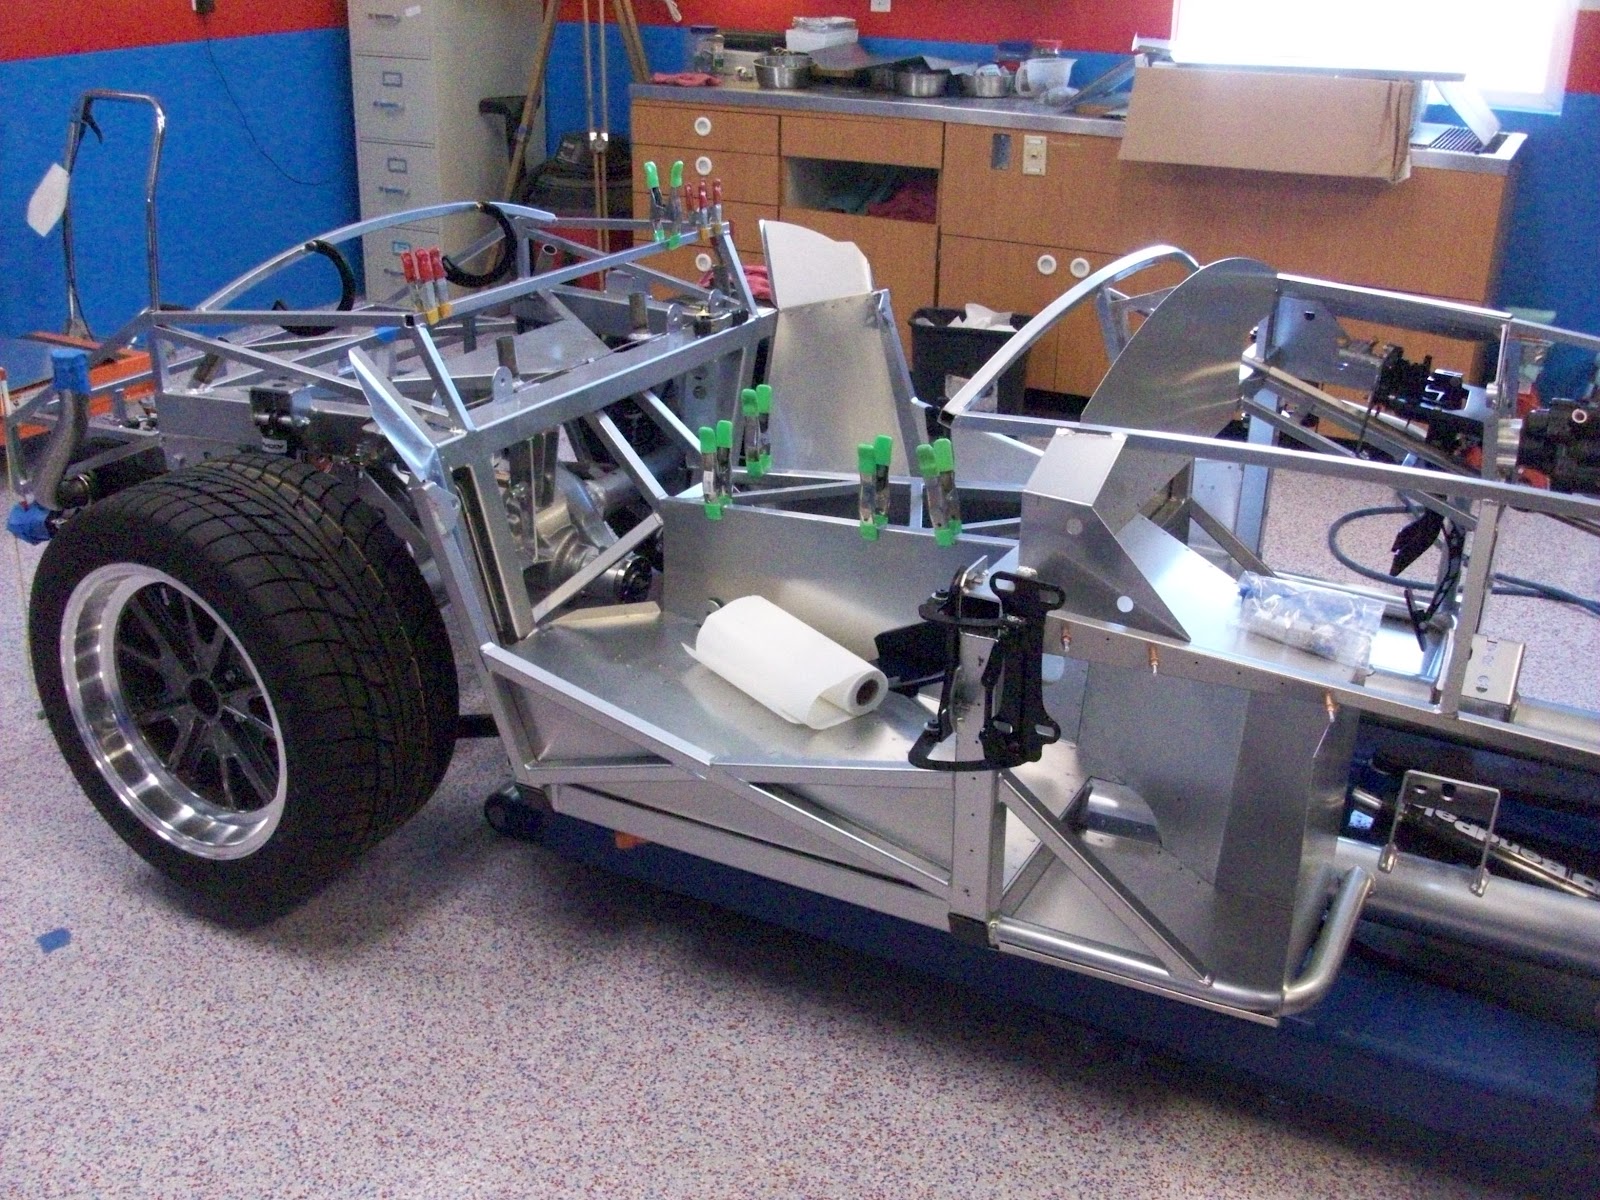 |
| Progress on the cockpit aluminum panels - floors and rear corners done |
 |
| Cleco's (temporary fasteners) are cool! |
 |
| Rear bulkhead of cockpit just sitting in place (not installed). |
Starting Electrical/Wiring:
The supplied wiring harness is custom made for the car - but is still gonna be a challenge to get installed. Some of the harness elements (ends/connectors) don't seem to end up in the right places on the car, and will need to be modified a bit ....
 |
| The black "snake" is the wiring harness (part of it!) sorta draped onto the chassis to check for placement. It needs to be modified for better fit .... |
 |
| Part of the harness laid out on the bench for dis-assembly and modification (!) |
So I'm busy gathering/ordering parts needed to modify the harness - terminal strips, crimp connectors w/heat shrink, crimping tool, under dash courtesy lights and so on. Not to mention an after-market self-cancelling turn signal module (from Russ Thompson), and a push button start-stop system (Watson StreetWorks). Additionally, the glove box "kit" is on it's way here from Oregon
As a side note - while I love living in St George, some (most!) of the stuff electrical stuff I need is just not available locally. Not to mention the proper type (thickness and temper) aluminum sheet for some modifications which is simply not available except as a full 4 x 8 sheet - which I can't handle and which "they" can't cut into smaller sheets.
So the "Google is my friend" for locating & ordering stuff .... and the UPS guy is my friend getting stuff to me.
Part of the electrical install is finalizing the dash elements and their layout. Rather than using the FFR supplied "street dash", I'm using a "Competition dash" that I got from my friend Luis in Santa Clarita (who's also building a Mk 4 "Anniversary" Roadster.
The "street dash has the tach and speedo in front of the driver, but the Competition dash has the tach in sorta in front of the driver and the speedo toward the middle of the dash (so the passenger can see it! -- LOL)
So using the white board, I'm laying out location for switches .... ignition, start-stop, headlights, wipers, horn and hazard lights (4-way flashers). Plus left-right turn signal and high beam indicators.
 |
| Comp dash temporarily clamped in place on the chassis |
 |
| Laying out switch locations on the white board .... |
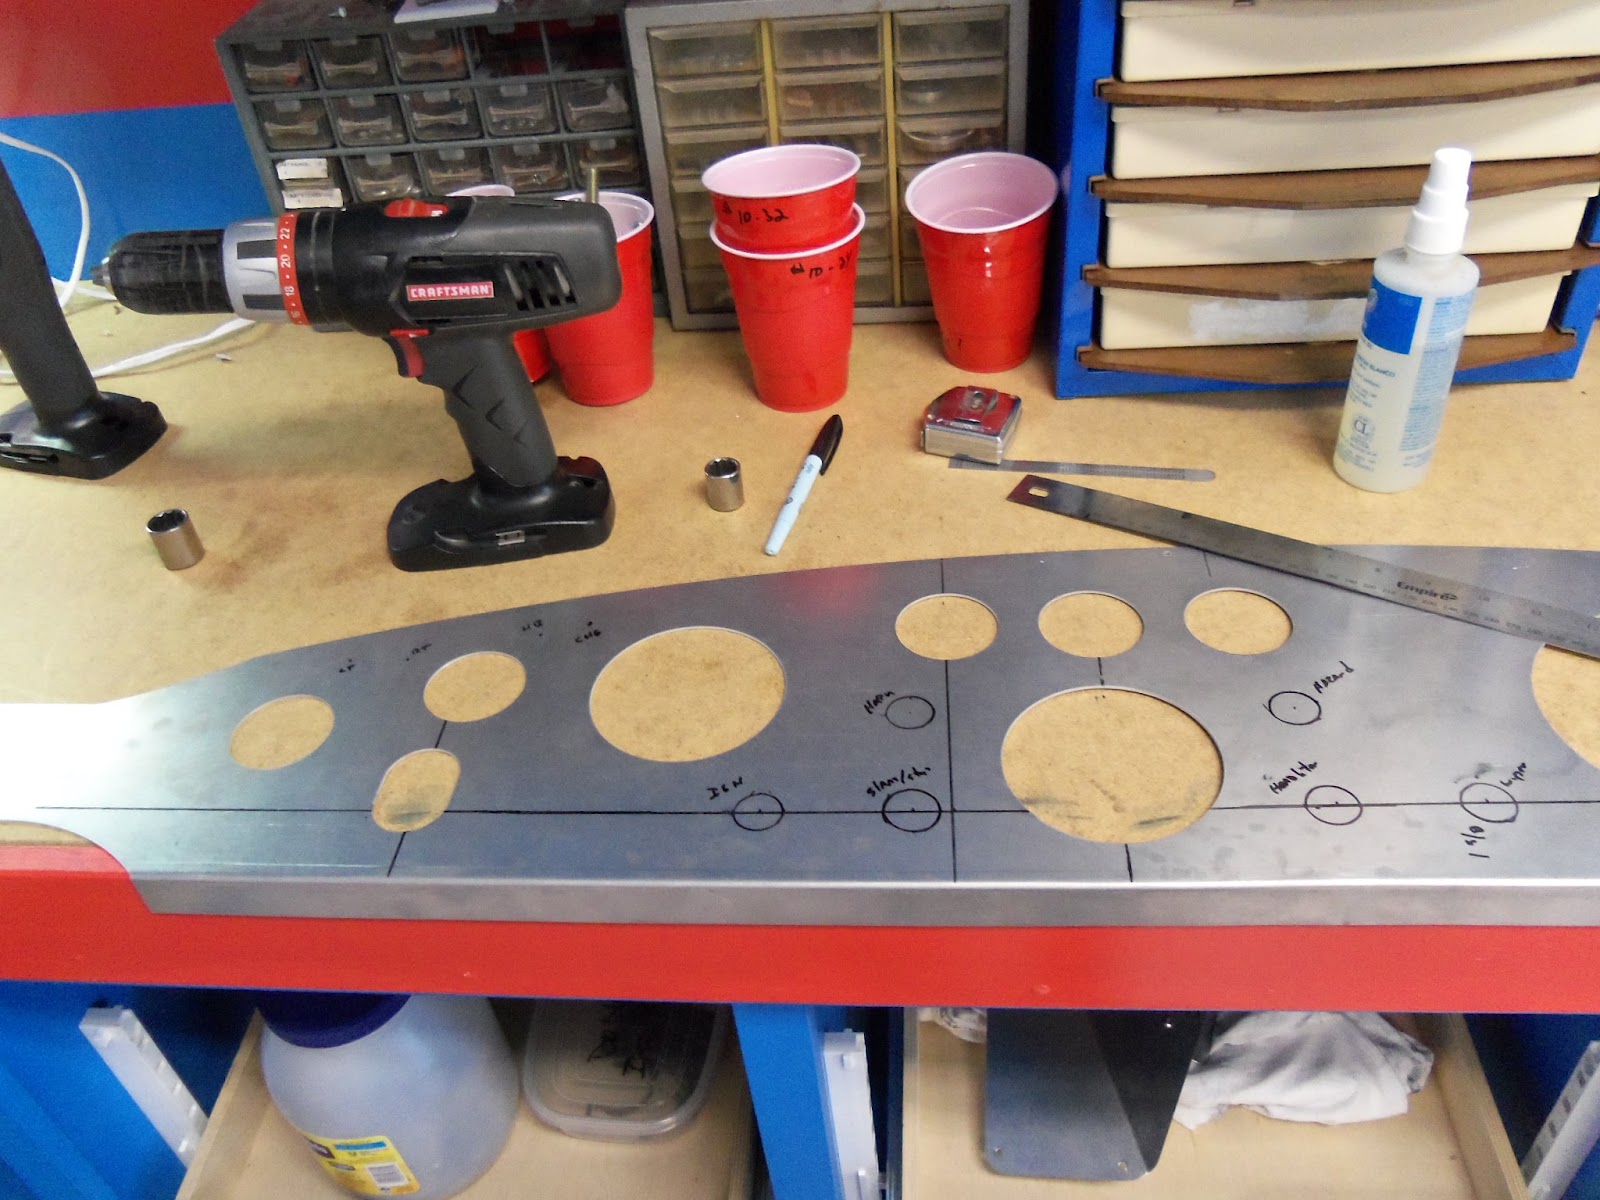 |
| And transferring locations to the dash. I have to start drilling holes pretty soon --- and it's gotta be right! |
Switches for seat heaters, fan over-ride, master disconnect, a clock, 12 volt "power ports" and iPod controls will be on a small console panel just below the center of the dash.
 |
| This is kinda the "model" for my dash .... at least for the under dash "console" (this Cobra has the "street dash"). I'm planning cup-holders and a transmission "mid-shift" as is also shown. |
Lessons:
Lots of lessons are being learned while building my car. Among them are "patience", "walking away" once in a while, the value of research .... there are hugely valuable Forums on the web, like "FFcars.com" ... and that everything does not go as planned.
 |
| Lessons "learned" and to be remembered! |